Options:
Obiously, you don't have any option to use Floppy Disk.
Materials needed:
1) SATA drivers(from your respective chipset manufacturer website, for me it's intel http://downloadcenter.intel.com)
2) WinImage(30 days trial copy from http://www.winimage.com)
Steps:
1) Download the intel SATA drivers. Make sure you get the correct file by downloading something called "Floppy Configuration Utility".
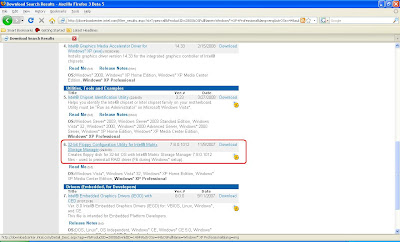
2) Extract the file and you will get green icon "f6flpy32".
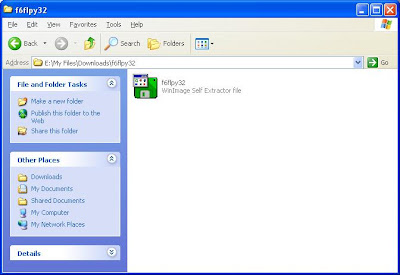
3) Extract the "f6flpy32" again and you will get this a file with .IMA extension.
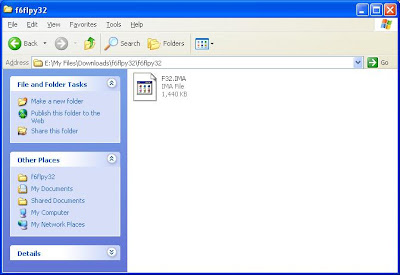
4) Ok, now you need to open up WinImage and browse to the latest extracted folder "f6flpy32" to load the .IMA file.
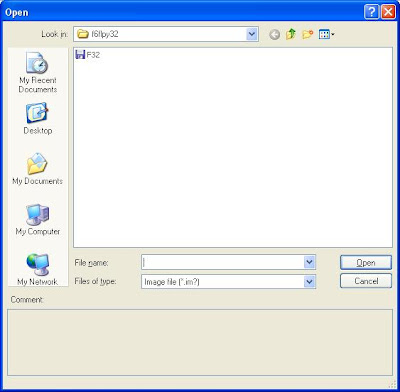
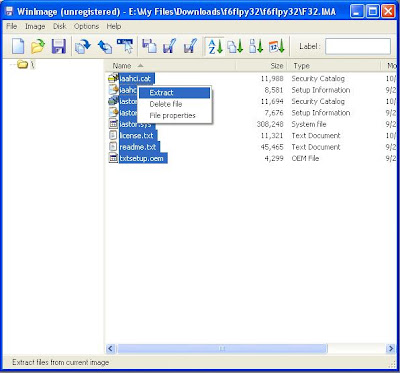
5) TATA, you will see all the SATA driver files needed for slipstreaming WinXp using nLite. Before you can use them, extract them to any folder(I name it "SATA driver" on my desktop) by selecting all of the files and choose "Extract".
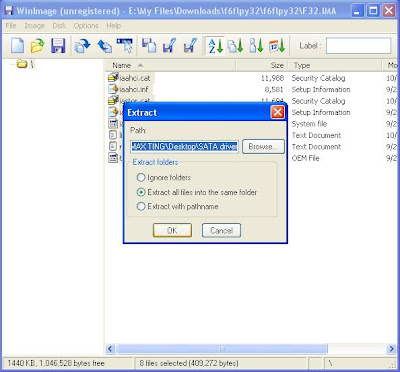
6) You will be prompted, choose "Extract all files into the same folder".
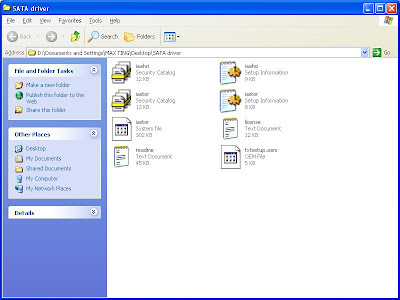
7) If you open up the "SATA driver" folder, the content is exactly the same with the content Floppy Disk. The difference is that you don't need a FD.
Proceed to?
A) Guide for "Slipstreaming SATA driver into WinXp boot cd using nLite"
Ref : http://maxeasyguide.blogspot.com

Obiously, you don't have any option to use Floppy Disk.
Materials needed:
1) SATA drivers(from your respective chipset manufacturer website, for me it's intel http://downloadcenter.intel.com)
2) WinImage(30 days trial copy from http://www.winimage.com)
Steps:
1) Download the intel SATA drivers. Make sure you get the correct file by downloading something called "Floppy Configuration Utility".

2) Extract the file and you will get green icon "f6flpy32".

3) Extract the "f6flpy32" again and you will get this a file with .IMA extension.

4) Ok, now you need to open up WinImage and browse to the latest extracted folder "f6flpy32" to load the .IMA file.

5) TATA, you will see all the SATA driver files needed for slipstreaming WinXp using nLite. Before you can use them, extract them to any folder(I name it "SATA driver" on my desktop) by selecting all of the files and choose "Extract".

6) You will be prompted, choose "Extract all files into the same folder".

7) If you open up the "SATA driver" folder, the content is exactly the same with the content Floppy Disk. The difference is that you don't need a FD.

Proceed to?
A) Guide for "Slipstreaming SATA driver into WinXp boot cd using nLite"
Ref : http://maxeasyguide.blogspot.com
No comments:
Post a Comment