open/ create the .vimrc file in home directory (~)
set nohlsearch
set nobackup
set ts=4
set expandtab
set shiftwidth=4
set nowrap
Tuesday, December 4, 2012
Friday, November 30, 2012
The easiest ways to navigate methods in a class using Eclipse keyboard shortcuts
Java classes can get big and hairy, making it difficult to find the method you’re looking for when browsing or editing a class. There is no specific order to where methods can be in a class and different developers have different preferences about where to put them.
You could use the mouse wheel and scroll ferociously until you eventually find the method or you could even use Page Down/Page Up on your keyboard. But these methods can be time-consuming and haphazard, especially when the class has lots of methods or they’re scattered in an arbitrary order.
Luckily, Eclipse has a number of fast and easy ways to help you navigate methods in a class, especially using the keyboard. I’ll discuss some of those keyboard shortcuts and also which ones to use when.
Quick Outline
The Quick Outline is basically a scaled-down popup version of the Outline View. The main advantage over the Outline View is that it has a search box that allows you to search for a method.
Here’s how to use the Quick Outline:
- Press Ctrl+O from anywhere within the class.
- Type a search term in the search box and Eclipse will just show all methods that match the search term. By default Eclipse does an exact match search, but you can use wildcards.
- Once you see the method you’re interested in, press Down to select the method (if it’s not selected already).
- Press Enter once the method is selected. Eclipse will take you directly to the method’s declaration.
This is an example of the popup for Java’s ArrayList.
 Searching for *rem will search for all method names that contain the word rem. Here’s an example:
Notes:
- Sort the view using the the down arrow menu in the top right corner. It makes it easier to find methods by scanning.
- Resize the Quick Outline popup to see more methods. Eclipse remembers the size of the popup for the next time you open it.
Next Member & Previous Member
Another way to move between methods is to use two features called Go To Next Member and Go To Previous Member.
When you press Ctrl+Shift+Down, Eclipse moves the cursor to the next method in the class. Pressing Ctrl+Shift+Up moves to the previous method.
Here’s a video to give you a quick example of how these shortcuts work:
This shortcut works best if you’re already positioned in a method or if the class has few fields. That’s because to Eclipse a member can either be a method or a field. If you’re at the top of the class, you have to move through all the fields before you actually start moving through the methods themselves, a time-consuming process especially for bigger classes with lots of fields.
It helps to generate getters and setters at the bottom of the class because you don’t have to navigate through them to get to the useful methods.
Open Declaration
If you’ve got lots of private methods in your class then Open Declaration might be the best way to navigate between them.
When you’re positioned on a method call and press F3, Eclipse takes you directly to the definition of that method. For example, if you’re busy in the method process() and your cursor’s positioned on initProcessing(), pressing F3 will take you directly to the declaration for that method further down the class.
1 |
2 |
3 |
4 |
5 |
6 |
7 |
8 |
9 |
This feature works very well with Alt+Left (Backward History). See the section below for more details about the Backward History.
Navigating Back to a Previously Viewed Method
While browsing code, you’ll often want to return to the previous method you were viewing once you’re done viewing the method it calls.
To do this, use Alt+Left (Backward History) to move back to the last navigation point. This feature isn’t specific to just methods, but also works for navigating between previously visited editors. But it works great if you’ve just been browsing methods within a class.
Quick Mentions
- Eclipse’s Outline View also allows easy navigation but mostly with the mouse. You could navigate to the view using Alt+Shift+Q, O, and you can move to methods by typing their first letter, but I’ve found the Quick Outline to be more keyboard friendly. Also, the Outline View doesn’t support wildcard searches.
- You can also use Eclipse’s Call Hierarchy (Ctrl+Alt+H) especially if you’re trying to understand the flow of methods in a class and move between them easily. Knowing how to navigate between views and editors with the keyboardhelps a lot since you’ll be moving between the Call Hierarchy view and editors a lot.
What Should I Use When?
- Use Next/Previous Member shortcut if the class is small or you have a good idea of where other methods are in relation to the current method (eg. are they above/below the current method).
- Use the Quick Outline if you don’t know the class too well or there are lots of methods in the class.
- Use Open Declaration if you’re moving between many private methods of the class. It’s normally the fastest way to move to another private method in the class, but only if you’re already positioned in a method that calls it.
Monday, November 26, 2012
Solved: Network Unlock Samsung Galaxy S2 + JB 4.1.2 firmware
I updated to JB 4.1.2 firmware ( I9100XXLSJ ) yesterday and my phone kept complaining about Network Lock. Which i have fixed in few easy steps.
We assume that your phone is rooted ( I may add a tutorial on this later)
1. Download and Install this given apk ( GalaxSimUnlock.apk )
2. Once you open the apk it will show you the current status of your phone.
3. Click the white bar at bottom.
4. If asked grant the root previlages.
5. It will inform you about the network unlock. ( Now simple restart the phone) .
- Mihir Patel
=====================================================
This is the easiest method that i found that works. Let us know if it does not work for you. and post your solution if you have anything better !
Friday, November 23, 2012
How to Access Google Now on Your Jelly Bean

There are two ways we’ve found to access Google Now. The first is by just tapping the persistent Google search bar. The second is by placing a Google Search icon on your home screen. The latter method is especially useful so that accessing Now doesn’t require you to reach all the way to the top of the device.
Thursday, November 22, 2012
Saturday, November 17, 2012
How-to: Connect Android Samsung Galaxy S2 USB Storage
I was having problems connecting my Samsung Galaxy S2 over USB on Ubuntu, which is particularly annoying bearing in mind the total lack of native support by Samsung for Linux. Strange enough, it works flawlessly on Windows 7, where it recognises all the phone's storage it instantly and I can transfer files between my phone and computer.
When I plug it into a Linux machine, the phone storage is recognised and I can see the folder structures of the phone and the SD card but I cannot even see, much less access the contents of any file or folder as all the folders appear empty. They are not.
Connecting the phone via USB gives no "mount USB" option, the MTP (Media Transport Protocol) application automatically kicks in and mounts the media, sans contents!
You'll be happy to know the previous set of USB utilities is still there to use. This is a work around rather than a permanent fix. RC
- On your android phone, go to Application->Settings
- In there, go to Wireless and Network and select USB Utilities
- Click on Connect Storage to PC, before you connect a USB cable
- A message should pop up: Connect USB cable to use mass storage
- Now connect the USB cable to computer
- The green android robot should be displayed with an option button for "Connect USB storage;" click on that.
- The green robot turns orange and now you can access the files on the internal storage and SD card of your phone.
Thursday, November 15, 2012
Installing Cygwin/X
Cygwin tools are, in the words of the Cygwin development homepage, http://cygwin.com/, "ports of the popular GNU development tools and utilities for Windows 95, 98, and NT. They function by using the Cygwin library which provides a UNIX-like API on top of the Win32 API." Cygwin allows the compilation of the X Window System source on Win32; several patches were made to the X Window System source to make it actually compile and run under Cygwin.
Cygwin has a nice setup program that downloads and installs the necessary Cygwin packages for you.
- Open the Cygwin, http://cygwin.com/ page in your web browser
- Click the "Install Cygwin Now" link in the upper-right hand corner of the page. This link downloads setup.exe from the primary Cygwin server; save setup.exe to the directory that you would like to store the downloaded packages in (e.g. c:\download); do not save setup.exe to c:\cygwin, as that is the default directory for the extraction and installation of the downloaded packages.
- Run setup.exe, you will see the welcome screen:
- Click to proceed to the next screen.
- Choose, Install from Internet, this will still save the package files to your download directory so that you can install Cygwin on any number of machines:
- Click to proceed to the next screen.
- The default Install Root is c:\cygwin which should be fine for most installations. Leave Default Text File Type as UNIX. Leave Install For set to All unless you lack local administrative privileges.
- Click to proceed to the next screen.
- Local Package Directory should default to the directory that you ran setup.exe from:
- Click to proceed to the next screen.
- Choose your proxy setup, or, just choose Direct Connection if no proxy is needed:
- Click to proceed to the next screen.
- Select your nearest mirror for downloading:
- Click to proceed to the next screen; setup will download a list of available packages as it moves to the next screen.
- On the next screen you will select the packages that will be downloaded and installed. A listing of the Cygwin/X packages is given below; a listing of the general Cygwin packages would be beyond the scope of this document.
Cygwin/X packages are located in the X11 category.
- xorg-server (required, the Cygwin/X X Server)
- xinit (required, scripts for starting the X server: xinit, startx, startwin (and a shortcut on the Start Menu to run it), startxdmcp.bat )
- xorg-docs (optional, man pages)
- X-start-menu-icons (optional, adds icons for X Clients to the Start menu)
- You may also select any X client programs you want to use, and any fonts you would like to have available.
- You may also want to ensure that the inetutils or openssh packages are selected if you wish to use telnet or ssh connections to run remote X clients.
- Click to begin the download process, you may want to try another mirror if you see a "Connecting" message on this screen for a long period of time:
- After the packages are downloaded, setup will automatically begin to install them:
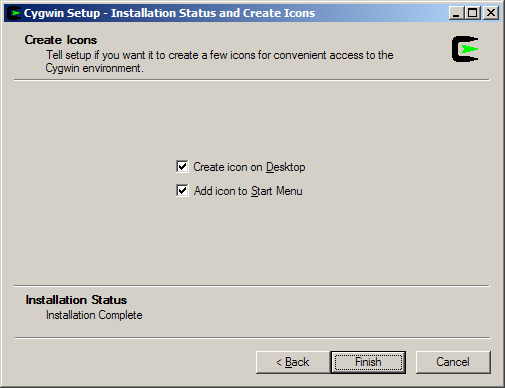
- I highly recommend allowing Cygwin Setup to create Desktop and Start Menu icons for you; these icons simply launch a bash shell:
- Click to close the setup program.
You have now successfully installed Cygwin/X. Proceed to Chapter 4 for instructions on how to use Cygwin/X.


CategoryInfo : NotSpecified: (:) [], PSSecurityException + FullyQualifiedErrorId : RuntimeException
When I try to execute my PowerShell script I get this error:
File C:\Common\Scripts\hello.ps1 cannot be loaded because the execution of scripts is disabled on this system. Please see "get-help about_signing" for more details.
At line:1 char:13
+ .\hello.ps1 <<<<
+ CategoryInfo : NotSpecified: (:) [], PSSecurityException
+ FullyQualifiedErrorId : RuntimeException
You should type the following to make it go to unrestricted mode:
Set-ExecutionPolicy unrestricted
Note:
The Default Execution Policy is set to restricted, you can see it by typing:
Get-ExecutionPolicy Friday, November 9, 2012
How to Setup SSH for Auto Login
It's common to use ssh and scp for communicating and transferring files to and from a server. If you want to auto-login without a password, here's how to setup SSH to use encryption keys to do so.
On the Server
Use ssh to login to your server under the account name you want to use.
Run ssh-keygen to create an encryption key pair, the public and private keys. You can just hit return for each question.
[backup@server ~]$ ssh-keygen -t rsa
Generating public/private rsa key pair.
Enter file in which to save the key (/home/backup/.ssh/id_rsa):
Created directory '/home/backup/.ssh'.
Enter passphrase (empty for no passphrase):
Enter same passphrase again:
Your identification has been saved in /home/backup/.ssh/id_rsa.
Your public key has been saved in /home/backup/.ssh/id_rsa.pub.
CD to the .ssh dir and list the files to understand what you've got:
[backup@server ~]$ cd .ssh
[backup@server .ssh]$ ls
id_rsa  id_rsa.pub
Add the public key id_rsa.pub to the SSH authorized_keys file. Be sure to use the >> to append it to any other keys you might have:
[backup@server .ssh]$ cat id_rsa.pub >> authorized_keys
Be sure the file is hidden from other users, and you can delete the public key now.
[backup@server .ssh]$ chmod 600 authorized_keys
[backup@server .ssh]$ rm id_rsa.pub
On the Client
Log-off the server, so you're back on the client. Enter your .ssh directory and download the id_rsa file (the private key) from the server to your local machine:
$ cd .ssh
$ scp backup@server.example.com:.ssh/id_rsa .
$ chmod 600 id_rsa
Try it out:
$ ssh -l backup server.example.com
[backup@server ~]$
And you can use scp for secure file transfer:
$ scp backup.tar.gz backup@server.example.com:.
SSH Agent
You can setup an environment variable to make it possible for programs that use SSH to find your keys, avoiding the requirement than you enter your passphrase each time.
Insert some lines like this into your .bash_profile:
if [ -z "$SSH_AUTH_SOCK" ] ; then
    eval `ssh-agent -s`
    ssh-add
fi
How to setup automatic login with ssh without a password
Install a ssh client.
Download Cygwin and install the ssh package.
If you are working with us, see our recommended setup for cygwin for what else you should install.
Auto login for ssh
Excellent instructions are provided here, a summary is provided below.
- Login to the ssh server with your client.
- Generate your key pair using the following command:
$ ssh-keygen -t rsa
Generating public/private rsa key pair.
Enter file in which to save the key (/home/jurn/.ssh/id_rsa):
Enter passphrase (empty for no passphrase):
Enter same passphrase again:
Your identification has been saved in /home/jurn/.ssh/id_rsa
Your public key has been saved in /home/jurn/.ssh/id_rsa.pub
$ cd ~/.ssh
$ cat id_rsa.pub >> authorized_keys
$ chmod 600 authorized_keys
Don't use any passphrase - Log out of the server and go back to your local shell
$ cd
$ mkdir .ssh
- Copy the file id_rsa that was generated on the server into this directory. You can use sftp or scp for this.
$ cd .ssh
$ chmod 600 id_rsa
- You should now be able to login via ssh without having to prompt for a password.
Troubleshooting
In cygwin, your home is in the passwd file /etc/passwd, even if you set the $HOME environment variable
Check that the authorized_keys file on the server is not corrupted.
If you are having trouble you can use the -v option in ssh to give you some debugging info.
Lookup the man page for ssh if you are stuck.
Thursday, November 8, 2012
Install updates or packages on RHEL 5
login as root and do following ( Add repository)
cd /etc/yum.repos.d/
wget http://public-yum.oracle.com/public-yum-el5.repo
cd /etc/yum.repos.d/
wget http://public-yum.oracle.com/public-yum-el5.repo
Wednesday, November 7, 2012
How to change the hostname of a Linux system
Normally we will set the hostname of a system during the installation process. Many peoples don’t care about this, and don’t change the hostname even if for example this was set to something really stupid by the datacenter that installed the system (most likely they will set this to “debian” on any debian installation, etc). For me, it is important to see on each one of the ssh screens I will have open at any time a different hostname that is relevant and will give me quickly the information on what system I am logged in.
Change the hostname on a running system
On any Linux system you can change its hostname with the command ‘hostname‘ (surprised?)… Here are some quick usages of the command line hostname:
hostname
without any parameter it will output the current hostname of the system.
hostname --fqd
it will output the fully qualified domain name (or FQDN) of the system.
hostname NEW_NAME
will set the hostname of the system to NEW_NAME. This is active right away and will remain like that until the system will be rebooted (because at system boot it will set this from some particular file configurations – see bellow how to set this permanently). You will most probably need to exit the current shell in order to see the change in your shell prompt.
Permanent hostname change on Debian based systems
Debian based systems use the file /etc/hostname to read the hostname of the system at boot time and set it up using the init script /etc/init.d/hostname.sh
/etc/hostname
server
So on a Debian based system we can edit the file /etc/hostname and change the name of the system and then run:
/etc/init.d/hostname.sh start
to make the change active. The hostname saved in this file (/etc/hostname) will be preserved on system reboot (and will be set using the same script we used hostname.sh).
Permanent hostname change on RedHat based systems
RedHat based system use the file /etc/sysconfig/network to read the saved hostname at system boot. This is set using the init script /etc/rc.d/rc.sysinit
/etc/sysconfig/network
NETWORKING=yes
HOSTNAME="plain.domainname.com"
GATEWAY="192.168.0.1"
GATEWAYDEV="eth0"
FORWARD_IPV4="yes"
So in order to preserve your change on system reboot edit this file and enter the appropriate name using the HOSTNAME variable.
Use sysctl to change the hostname
Why would someone need a different method of doing the same thing as above? No idea, but here is anyway: use sysctl to change the variable kernel.hostname:
Use:
Use:
sysctl kernel.hostname
to read the current hostname, and
sysctl kernel.hostname=NEW_HOSTNAME
to change it.
Friday, November 2, 2012
How to do a global search/replace across files in Eclipse
The location of this command is not very intuitive. To search and replace in multiple files you need to select "Search" > "File...".
Step by step:
- Select the text in a file
- From the "Search" menu, select "File...". This will bring up the "Search" dialog box.
- At the bottom of the dialog, click "Replace..."
- This will bring up the "Replace" dialog box where you can type in your replacement text and replace individual occurrences or all occurrences.
Subscribe to:
Posts (Atom)